
Situation 1: The Drive Has No Partition
If there is no partition on the removable disk, only unallocated space is presented, then you will need to recreate a partition on it. There are three ways for you to create new partition.
Solution ①: Use MiniTool Partition Wizard to Create
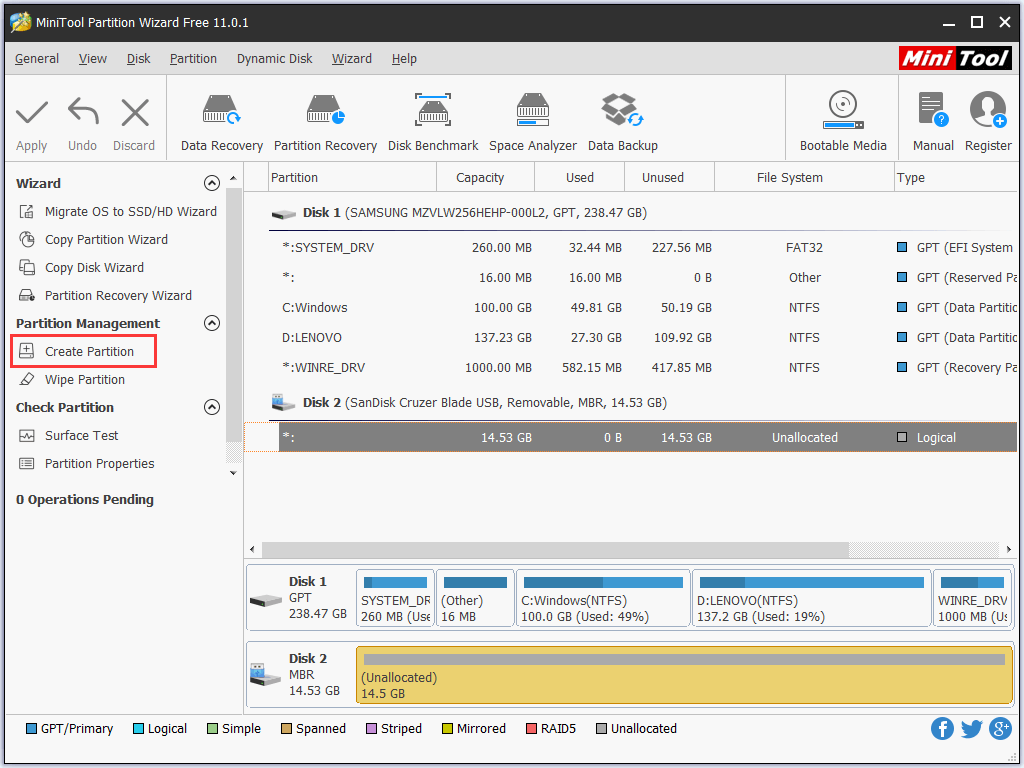
Step 1: Launch MiniTool Partition Wizard Free Edition and enter its main interface. Then click on the removable disk and choose "Create Partition".
Step 2: In the new presented window, specify the details of the new partition like Partition Label, Partition Type, File System, Drive Letter, and so on. Then click "OK" to continue.

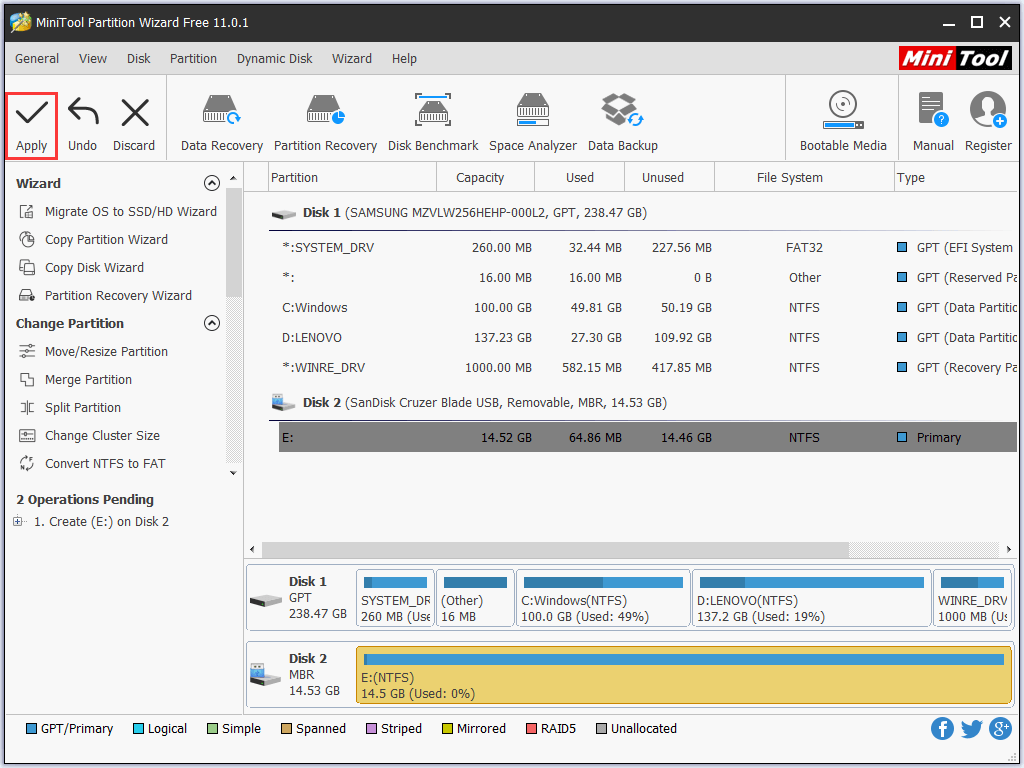
Step 3: Back to the main interface and you will see there is a partition on the removable disk. But this is just a preview. If you want to make some changes, you can click "Undo" or "Discard" to recreate partition. If you confirm the change, just press "Apply", then the new partition is created.
Solution ②: Use Disk Management to Create
Disk Management is also a good solution to manage partitions and disks for Windows computers. With a few simple clicks, you are able to create new volume on the removable disk that Windows cannot format.
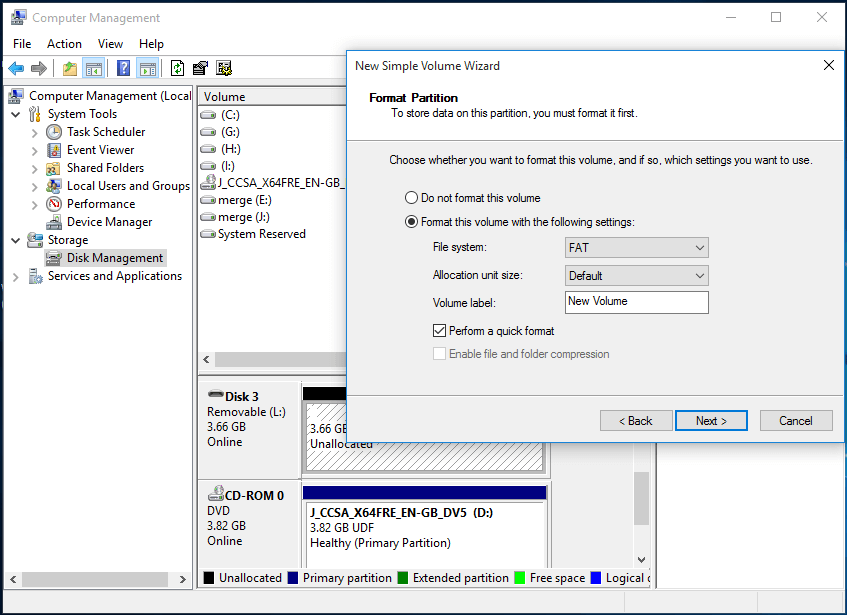
Step 1: Right click "My Computer", select "Manage", and then "Disk Management" OR run "DISKMGMT.MSC" to launch Disk Management. Then right-click on the removable disk and choose "New Simple Volume".

Step 2: In the new presented window, follow the guidance to specify the volume size, assign drive letter, format partition to finish partition creation.
Solution ③: Use Command Line to Create
Another reliable solution to create a partition based on Windows is command line. It looks like this method is complicated to common users, but it is not always in fact. Please follow the steps below and check whether it can get everything done.
Step 1: At Windows Start menu, run "Diskpart".

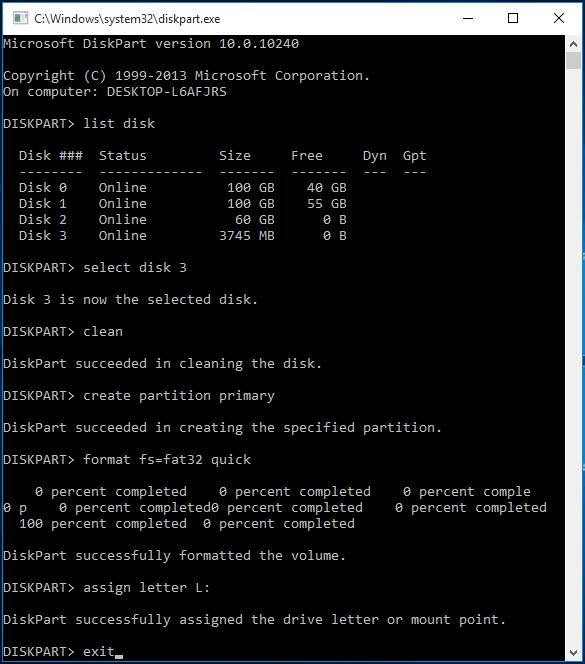
Step 2: In the command prompt window, enter the following commands in order (each should end up with Enter key):
- "list disk";
- "select disk n" where n is the disk number of the removable disk;
- "clean";
- "create partition primary"
- "format FS=FAT32 quick" or "format FS=NTFS quick";
- "assign letter N:" where N: can be other drive letter not occupied currently;
- "exit".
When any of the three solutions is carried out, the removable disk can be used normally.
Situation 2: The Drive Has RAW File System
RAW drive is a hard drive/partition which has not been formatted with the one of the following file system: FAT12/FAT16/FAT32 or NTFS. RAW drive can be caused by many reasons like virus infection, format failure, power outages, unrecognized file system, etc. To fix RAW file system, you can do one of the following solutions to reformat the removable disk.
Solution ①: Use Partition Wizard to Format
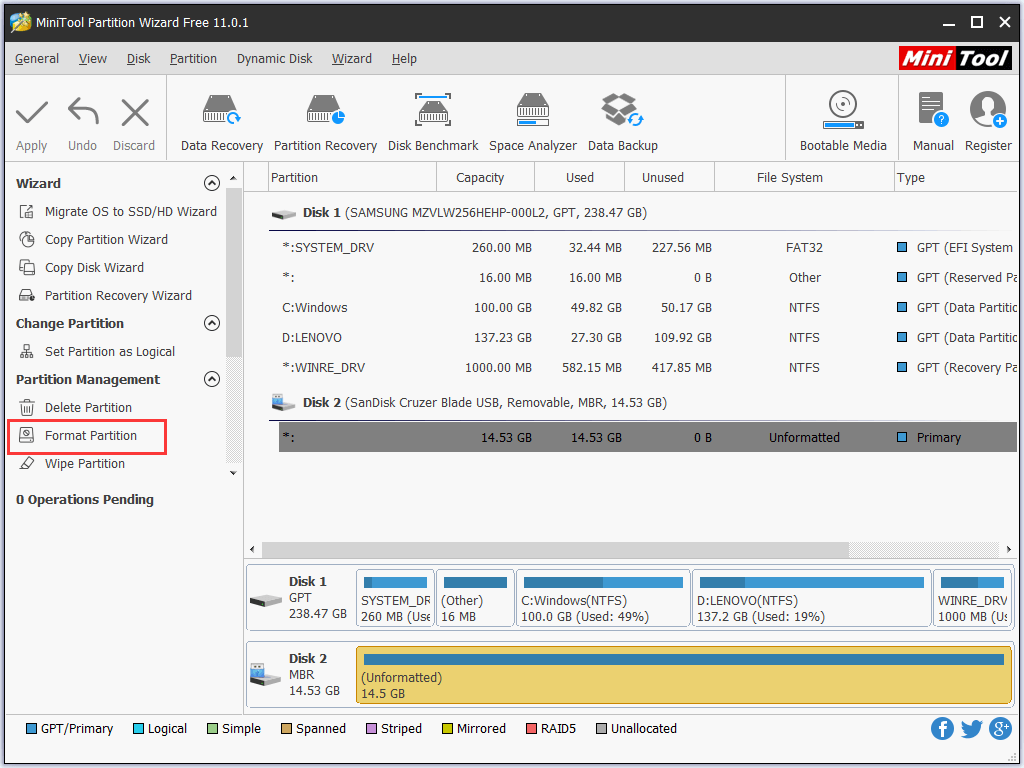
Step 1: Launch MiniTool to its main interface. In the middle pane you can see the RAW drive is shown as "Unformatted". Now click on this partition and choose "Format Partition".
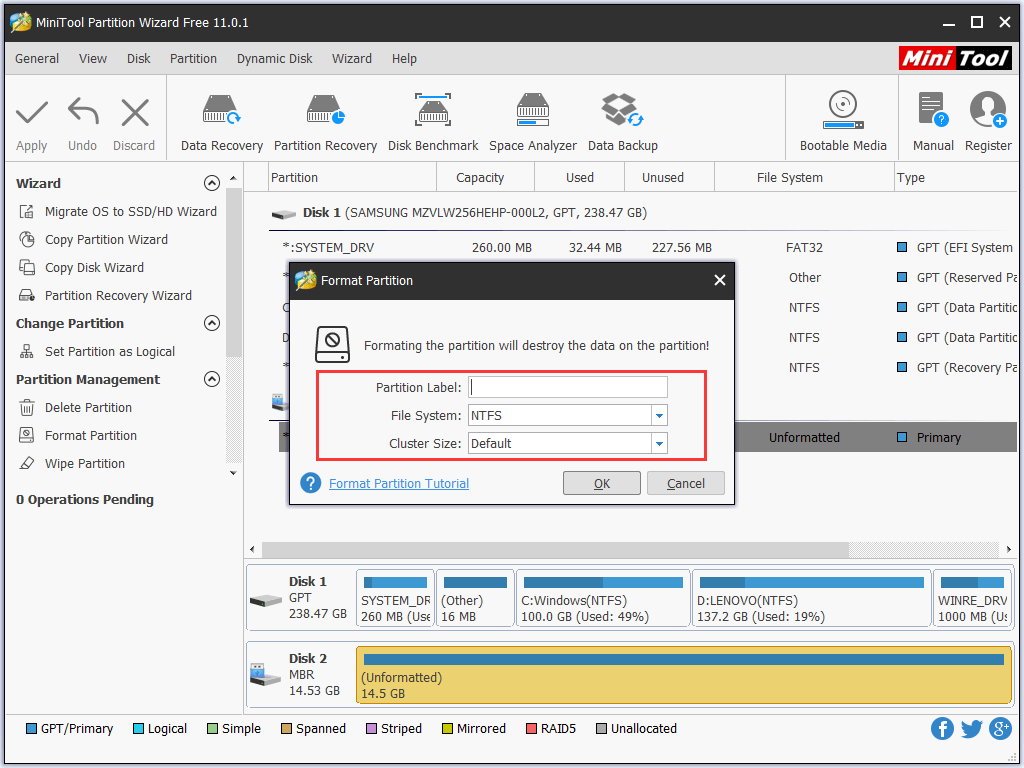
Step 2: In the new presented window, confirm the Partition Label, File System, Cluster Size and click "OK" to continue.
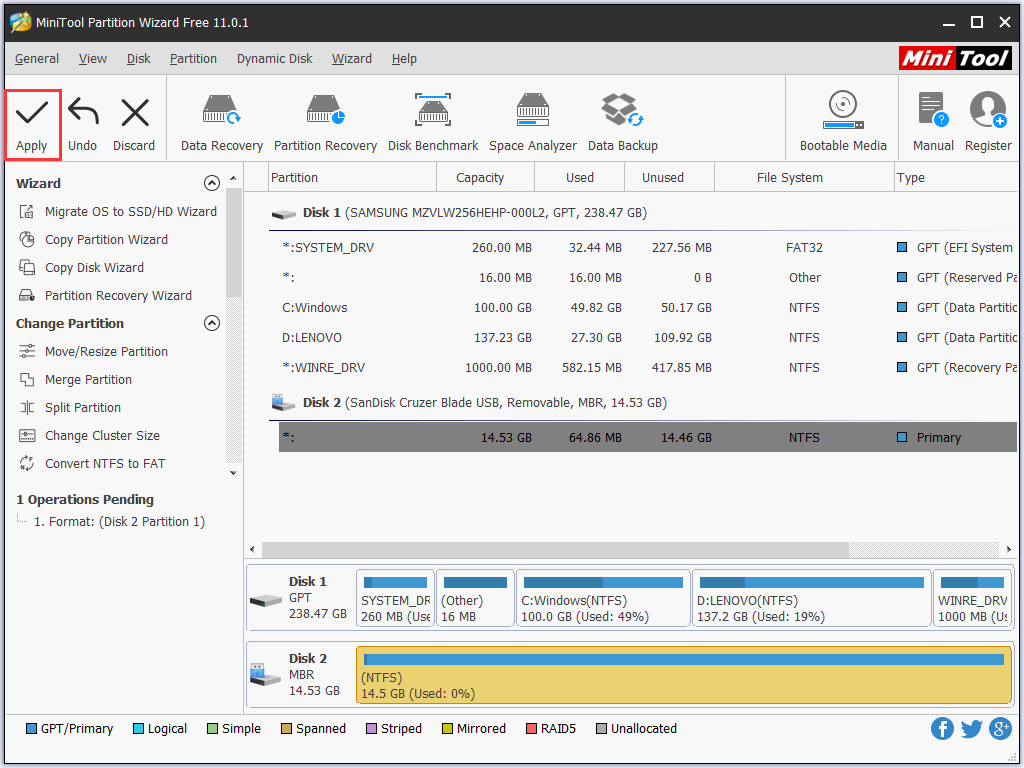
Step 3: See the partition on the removable disk will be changed. Now click "Apply" to save the changes.
Solution ②: Use Disk Management to Format
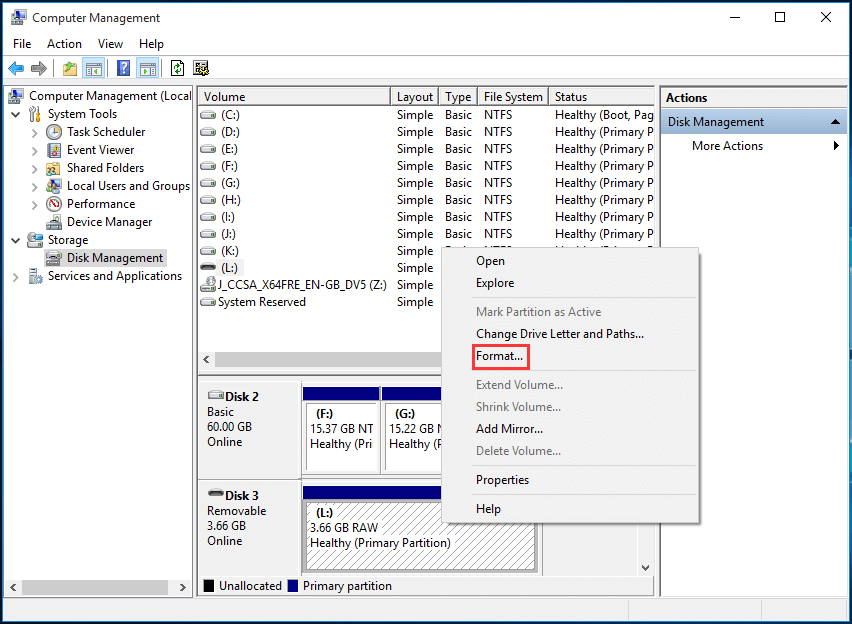
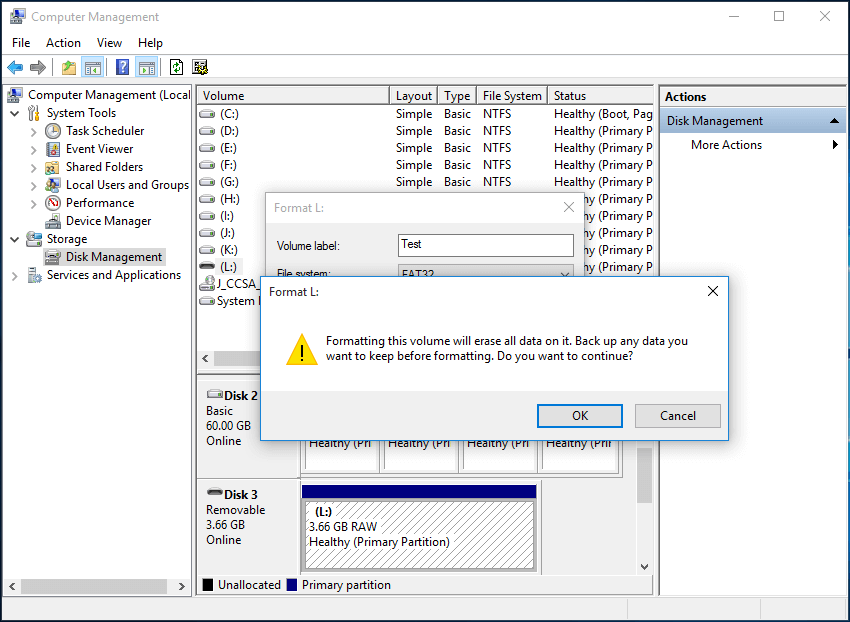
Step 1: Go to Disk Management and you can see the USB drive is listed on the middle panel.
Step 2: Right click the USB drive and select "Format" option to perform a quick format.
Step 3: In the new presented window, confirm the volume label, file system, allocation unit size, and choose whether to perform a quick format, then click "OK".

Step 4: Disk Management will warn you that "Formatting this volume will erase all data on it. Back up any data you want to keep before formatting." If you already have a copy of the hard drive and want to continue, click "OK", otherwise choose "Cancel" to prepare data rescue. Once formatting is done, the pen drive is ready for use.
Solution ③: Use Command Line to Format
Sometimes Disk Management is not as helpful as command prompt. Although using command prompt may seem complicated, it still deserves a trying.
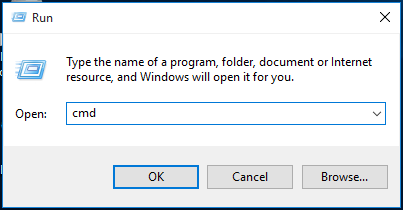
Step 1: Run "cmd" at Windows Start menu.
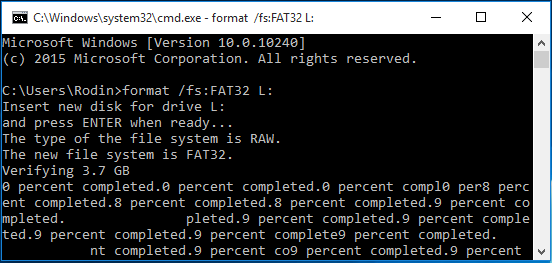
Step 2: Type "format N:/fs:FAT32" (N: refers to the target partition, and FAT32 can be replaced by NTFS). This process may last long.
Do you know the limitation about FAT32? If you want to convert FAT32 to NTFS after a lot of data is saved on removable disk, you can read this post to get new skills on how to break FAT32 limitations without losing data.
If all these solutions fail, you should consider whether there is something wrong with the removable disk. You should carry out virus checking and killing, you should check and repair bad sectors or you can check whether the hard drive is write protected and remove the protection. Finally, repeat these solutions.
Situation 3: Disk is Write Protected
Step 1: In the search bar, type “regedit” and click the regedit app icon to run it.

Step 2: In Registry Editor, go to HKEY_LOCAL_MACHINE > SYSTEM > CurrentControlSet > Control.

Step 3: Right-click Control folder, select New > Key.

Step 4: Now rename the New Key #1 folder into StorageDevicePolicies.


Step 5: Right-click on StorageDevicePolicies folder, select New, and QWORD (64-bit) Value if your PC is running with a 64-bit version, or DWORD (32-bit) Value if it’s with 32-bit.

Hint: see this Microsoft article to check whether your computer is running a 32-bit version or 64-bit version.
Step 6: Now rename the New Value #1 folder into WriteProtect.


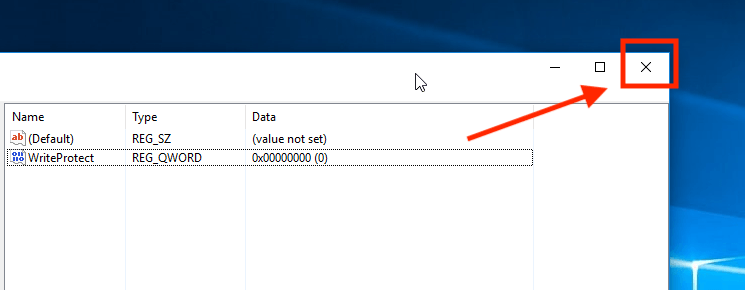
Step 7: Double click the WriteProtect folder, change the Value data: into “0” and Base to “Hexadecimal”, click “OK.”

Step 8: Close RegEdit by clicking the “X” icon.
Step 9: Open “This PC” (Windows 10) or “My Computer” (Windows Vista/XP), and refresh it 5 times without doing anything to your USB drive, and properly eject the flash drive.
Step 10: Now plug your USB drive again into your computer and format it to exFAT instead of FAT32.
Done!


